

How to install a Metric Thread Nylon Gland?
Jul 28, 2025
Installing a metric thread nylon gland is a crucial process when it comes to ensuring the proper protection and management of cables in various electrical and industrial applications. As a reliable supplier of metric thread nylon glands, I am here to guide you through the step-by-step installation process, offering insights and tips to make the task as smooth as possible.
Understanding Metric Thread Nylon Glands
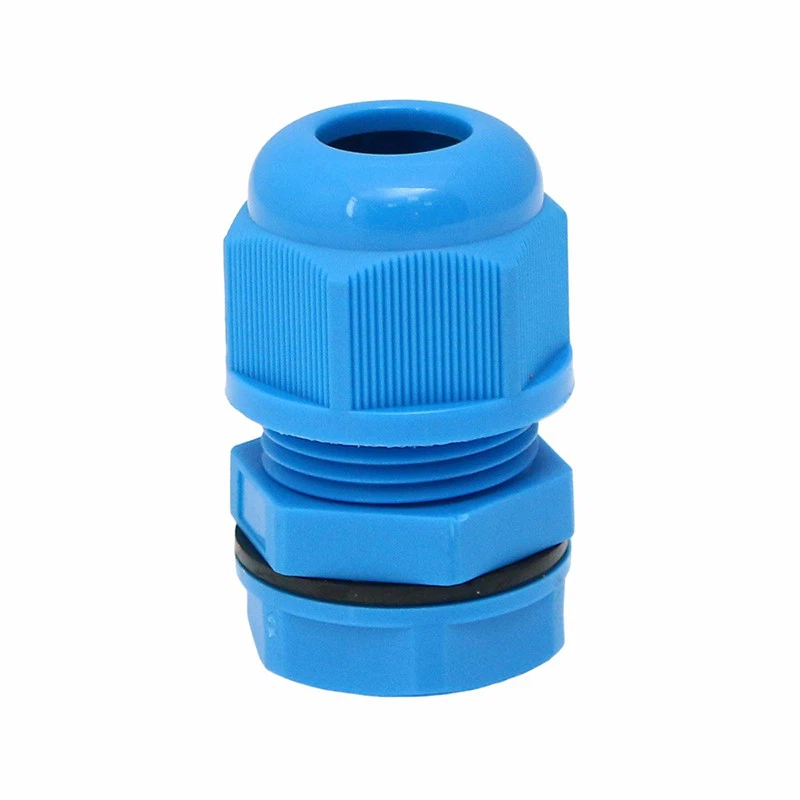
Before we dive into the installation process, it's essential to understand what metric thread nylon glands are and why they are widely used. Metric thread nylon glands are cable management devices designed to provide a secure and watertight seal around cables as they pass through panels, enclosures, or walls. Made from high-quality nylon, these glands offer excellent resistance to corrosion, chemicals, and mechanical stress, making them suitable for a wide range of environments.
There are different types of thread options available for nylon glands, including NPT Thread Nylon Gland, G Thread Nylon Gland, and PG Thread Nylon Gland. However, in this guide, we will focus specifically on metric thread nylon glands.
Tools and Materials Required
To install a metric thread nylon gland, you will need the following tools and materials:
- Metric thread nylon gland (suitable for your cable size and application)
- Cable
- Wrench or spanner (appropriate size for the gland)
- Sealant (optional, depending on the application)
- Drill and drill bits (if you need to create a hole for the gland)
Step-by-Step Installation Process
Step 1: Select the Right Gland
The first step in the installation process is to select the right metric thread nylon gland for your application. Consider the following factors when choosing a gland:
- Cable size: Ensure that the gland is compatible with the diameter of your cable. Most glands are labeled with the recommended cable sizes they can accommodate.
- Thread size: The metric thread size of the gland should match the threaded hole in the panel or enclosure where you plan to install it.
- Environmental conditions: If the gland will be exposed to harsh environments, such as high humidity, chemicals, or extreme temperatures, choose a gland with appropriate sealing and protection ratings.
Step 2: Prepare the Cable
Before installing the gland, prepare the cable by stripping the outer insulation to expose a sufficient length of the inner conductors. The length of the exposed conductors will depend on the type of connection you need to make. Make sure to clean the exposed conductors to remove any dirt or debris.
Step 3: Drill the Hole (if necessary)
If you need to create a hole for the gland in the panel or enclosure, use a drill and the appropriate drill bit. The diameter of the hole should match the outer diameter of the gland's thread. Make sure to drill the hole perpendicular to the surface to ensure a proper fit.
Step 4: Apply Sealant (optional)
If your application requires a watertight or dustproof seal, you can apply a suitable sealant to the threads of the gland or the surface of the panel where the gland will be installed. This will help prevent moisture, dust, and other contaminants from entering the enclosure.
Step 5: Insert the Cable through the Gland
Insert the prepared cable through the central hole of the gland. Make sure the cable is centered and straight. If the gland has a locking mechanism, such as a locking nut or a sealing ring, ensure that it is properly installed and tightened around the cable.
Step 6: Install the Gland in the Panel
Insert the gland into the threaded hole in the panel or enclosure. Use a wrench or spanner to tighten the gland securely. Make sure not to overtighten the gland, as this can damage the threads or the gland itself. A good rule of thumb is to tighten the gland until it is snug and provides a good seal.
Step 7: Check the Seal
Once the gland is installed, check the seal to ensure that it is tight and there are no gaps or leaks. You can do this by visually inspecting the area around the gland or by performing a simple pressure test. If you notice any issues, such as a loose seal or a leak, adjust the gland or apply additional sealant as needed.
Step 8: Make the Connection
After the gland is installed and the seal is checked, make the necessary electrical connections to the exposed conductors of the cable. Follow the appropriate wiring diagrams and safety procedures for your application. Make sure to secure the connections properly to prevent any loose or exposed wires.
Tips and Best Practices
- Read the manufacturer's instructions: Before installing the gland, carefully read the manufacturer's instructions and guidelines. This will ensure that you install the gland correctly and avoid any potential issues.
- Use the right tools: Using the right tools for the installation process is essential. Make sure to use a wrench or spanner that is the appropriate size for the gland to avoid damaging the threads or the gland.
- Test the installation: After the gland is installed, test the system to ensure that it is functioning properly. Check for any signs of leaks, loose connections, or other issues.
- Maintain the gland: Regularly inspect the gland for any signs of wear, damage, or corrosion. Replace the gland if necessary to ensure continued protection and performance.
Conclusion
Installing a metric thread nylon gland is a relatively straightforward process that can be completed with the right tools and materials. By following the step-by-step guide and tips outlined in this article, you can ensure a proper and secure installation of the gland, providing reliable protection for your cables in various applications.
If you have any questions or need further assistance with selecting or installing metric thread nylon glands, please feel free to contact us. We are a leading supplier of high-quality metric thread nylon glands and other cable management solutions, and we are committed to providing our customers with the best products and services. Let's discuss your specific requirements and find the perfect solution for your needs.
References
- "Cable Glands Installation Guide," Various Manufacturers
- "Electrical Installation Handbook," Schneider Electric